Mend and Make Better: DIY Sashiko Embroidery
We’ve all been there: that horrible, heart-stopping moment when your favorite jeans rip at the knee, or a hole bursts in a prized vintage jacket. For most of us the instinct is to mourn or bitterly settle for the closest replacement. Still, one man’s calamity is another man’s opportunity, and if there ever was a way to breathe new life into your clothes, it’s through sashiko embroidery.
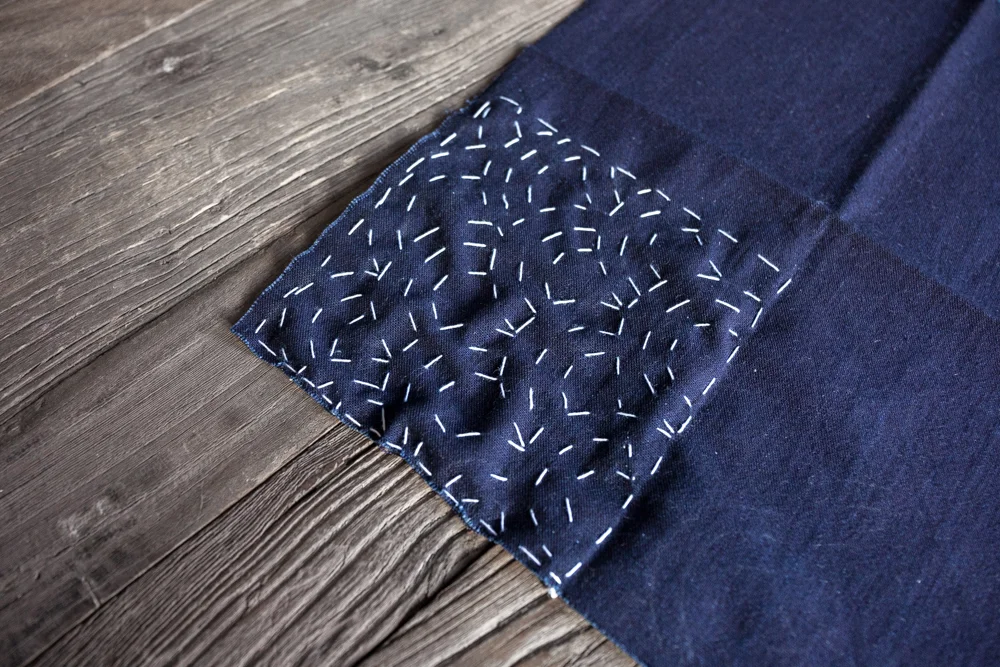
A combination of decorative and useful, sashiko is a form of Japanese folk embroidery characterized by a basic running stitch. Historically, sashiko embroidery was used to repair and reinforce worn-out garments and to add layers of fabric for warmth. Because of this, sashiko is often seen on heavy winter work clothing, though you may find it on kimono if you’re lucky. Quirky and rustic, it embeds textiles with a personality that reminds us of homemade clothes and the charm of handmade stitching.
Sashiko features geometric and linear designs that look not unlike a flurry of dashed lines. In fact, the Japanese word sashiko means “little stabs” and refers to the small stitches used in this type of needlework. The resulting geometric patterns can be straight or curved, but it’s their symmetry that sets them apart from other embroidery styles. Though sashiko is beloved by embroidery enthusiasts, the simple running stitch is perfect for beginners. As long as you can sew in a straight line, you can sew sashiko!
From left: pattern, chalk transfer paper, tracing paper, sashiko thread, fabric, sashiko needle
You Will Need:
- A pattern (see note below)
- Tracing paper
- Chalk transfer paper and a pencil for tracing (you can find some cheap options at the craft store or online)
- Sashiko needle
- Sashiko thread (you can substitute this for embroidery floss if you need)
- Solid cotton fabric
- Sashiko kits exist that include all of these materials
NOTE: The exciting part of planning your sashiko embroidery is finding a good pattern. There are a couple of traditional Japanese patterns that work beautifully on embroidery: the help-leaf pattern asanoha, and the wave-like seigaiha are good starter options. You can find many more options online- look for a simple geometric design that uses straight lines. For this project we used a seigaiha “wave” pattern.
Instructions
Draw your pattern onto the tracing paper. You will use this as a mock to draw directly on the fabric later.
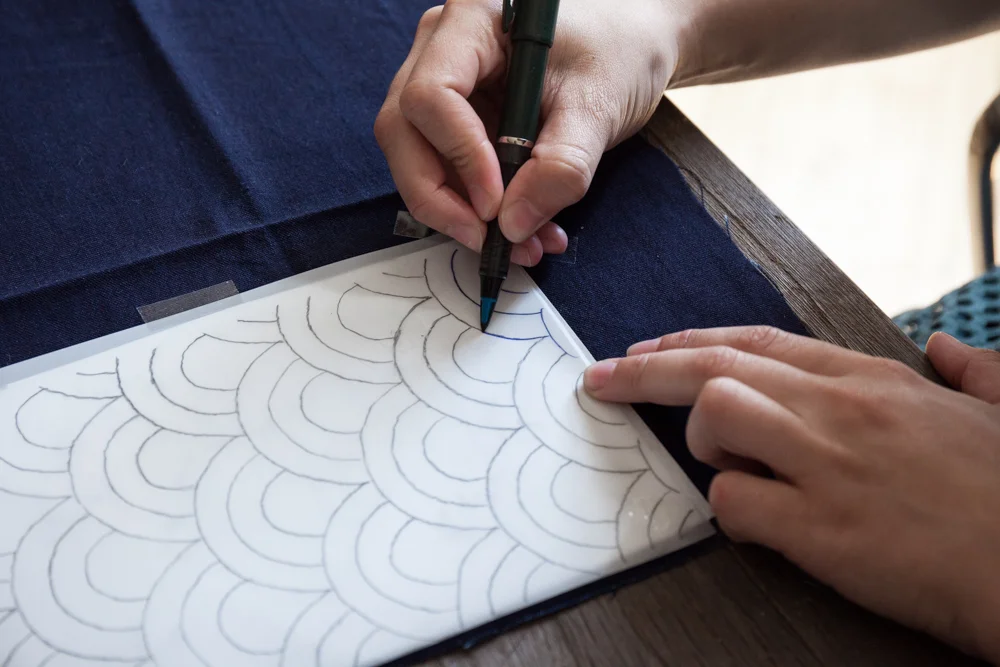
Lay the fabric flat on a tabletop and place the transfer paper directly over it, chalk-side down. Add the drawn tracing paper over the transfer paper. Secure with tape or a paperweight.
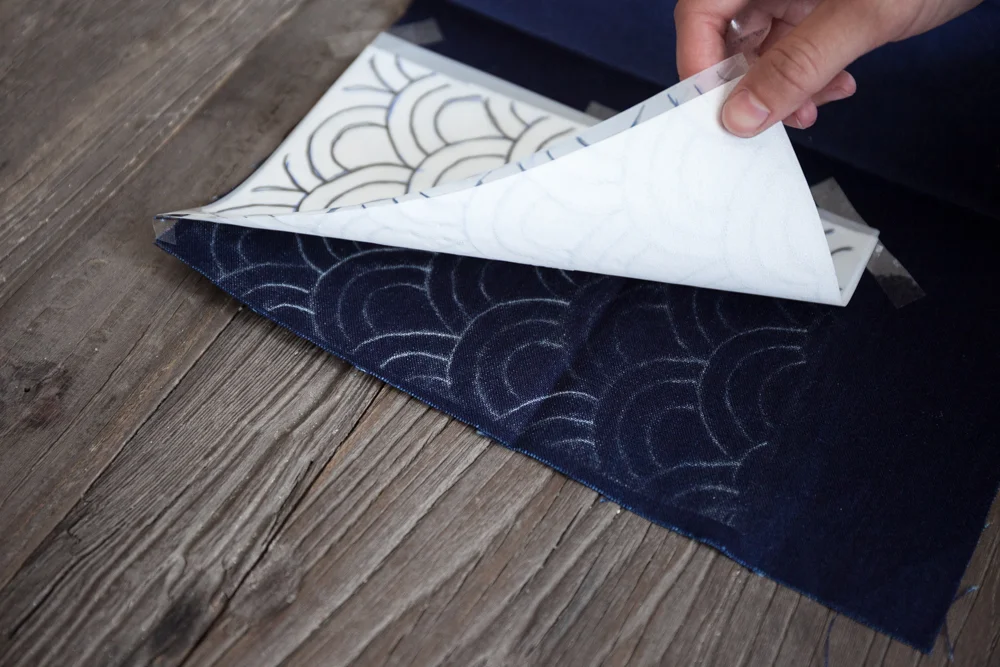
Trace the pattern on the tracing paper again, making sure to press hard. This will transfer the pattern directly onto the fabric.
4. Cut a length of sashiko thread and carefully thread your needle (make sure to double the thread if you’re looking to make a bold stitch). Knot the end.
5. Starting from the right corner of the marked fabric, pull the threaded needle through the starting point in your first marked line. Leave about an inch between the knotted end and the stitch to prevent puckering.
6. Working your needle from right to left along the marked line, run the thread in and out through the fabric without overlapping, making consistent ¼” stitches. The result should look similar to a running stitch. If you’re working on a straight line, you can make several stitches at once by puncturing dashes in the line and pulling your thread through the fabric all at once.
7. Using the marked fabric as a guide, continue to stitch over the chalk lines. If the fabric starts to pucker, simply pinch the fabric to stretch it and run your thumb over the line of stitches to smooth them out.
8. When you reach the end of a line, make a small knot on the wrong side of your fabric. Keep your corner stitches close together- remember that the pattern should look like a consistent dashed line drawing.
9. Admire your work- you’re done!


